If you're using Slipstream and want to set your template to a schedule here are some steps (these instructions also apply to editing a normal playlist):
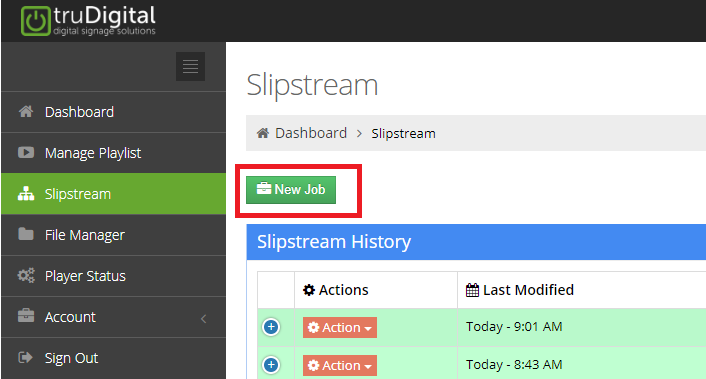
Step 1: Click Slipstream and select New Job

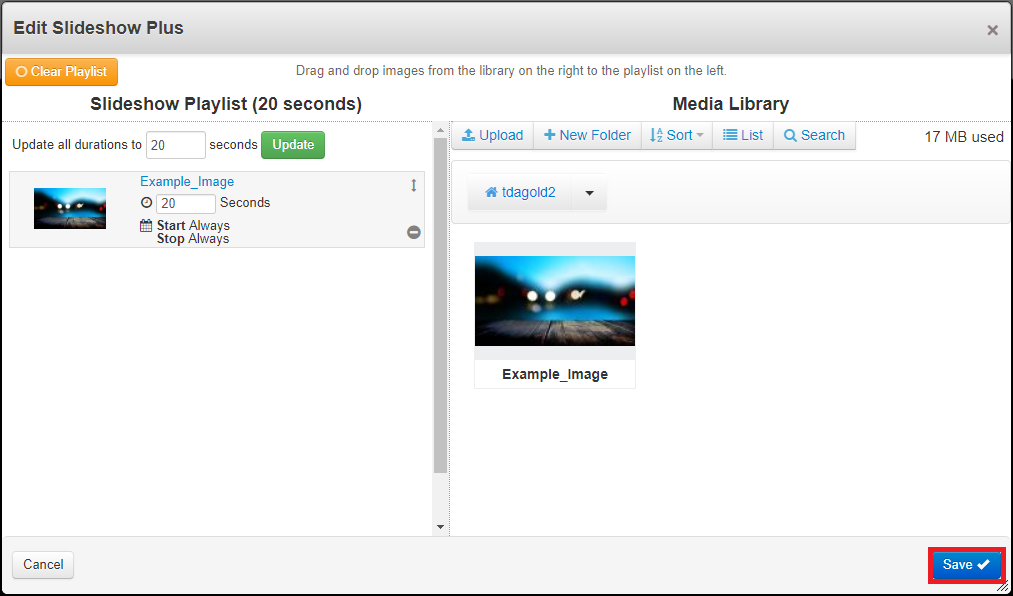
Step 2: Install the applicable template and edit. You have the option to either schedule the files within the template OR schedule the template itself. You would only want to schedule your files to expire inside the template if you have other files scheduled to replace them. The easiest and most common way to schedule content is to schedule the template in the Live Playlist, but you have the option to do either.
NOTE: If you schedule your files within the template and do not have any other files within the template to replace them after expiry, you will receive an error message on your player that says "No Scheduled Templates". In this case, you would need to manually remove the template from your playlist.


Save the template and you'll be taken back to the My Templates/playlist assembly area.
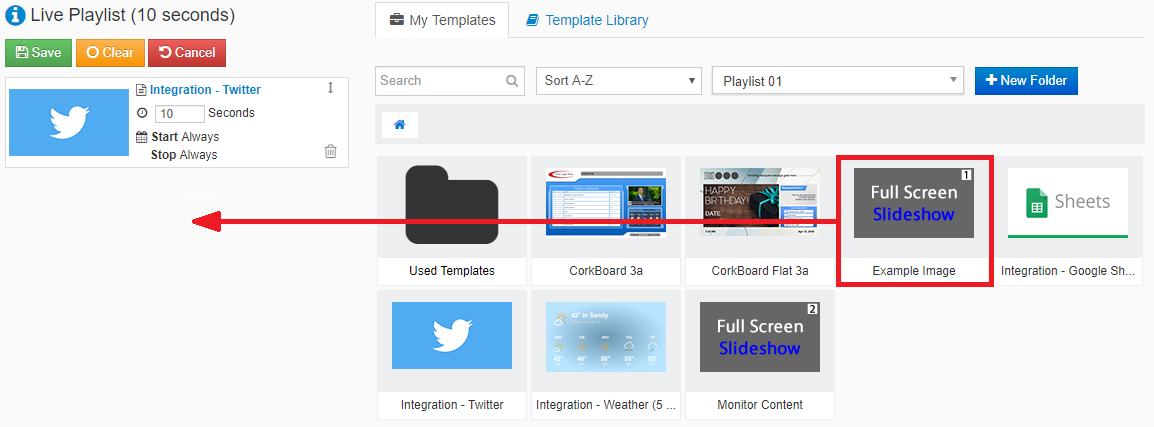
Step 3: Locate the template you edited and want to add to your playlist

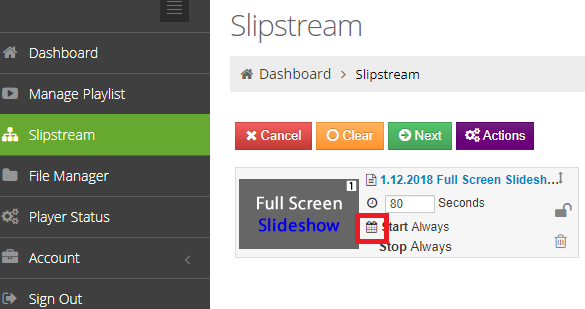
Step 4: If you are scheduling the template itself, now you can click the calendar icon to set your schedule

Step 5: Set the schedule for the template itself. Even if you scheduled content within the template, you can set an expiry date for the template to avoid any error messages.

Step 6: Click Next and run the slipstream job as you normally would.
NOTE: If you schedule your files within the template and do not have any other files within the template to replace them after expiry or did not set a schedule on the template, you will receive an error message on your player that says "No Scheduled Templates". In this case, you would need to manually remove the template from your playlist.
Was this article helpful?
That’s Great!
Thank you for your feedback
Sorry! We couldn't be helpful
Thank you for your feedback
Feedback sent
We appreciate your effort and will try to fix the article